Interior Crawl Space Access Door
- Understanding Smart Video Clips in Home Surveillance - March 5, 2026
- Access Control Installation - March 2, 2026
- Fire Alarm Systems - February 27, 2026
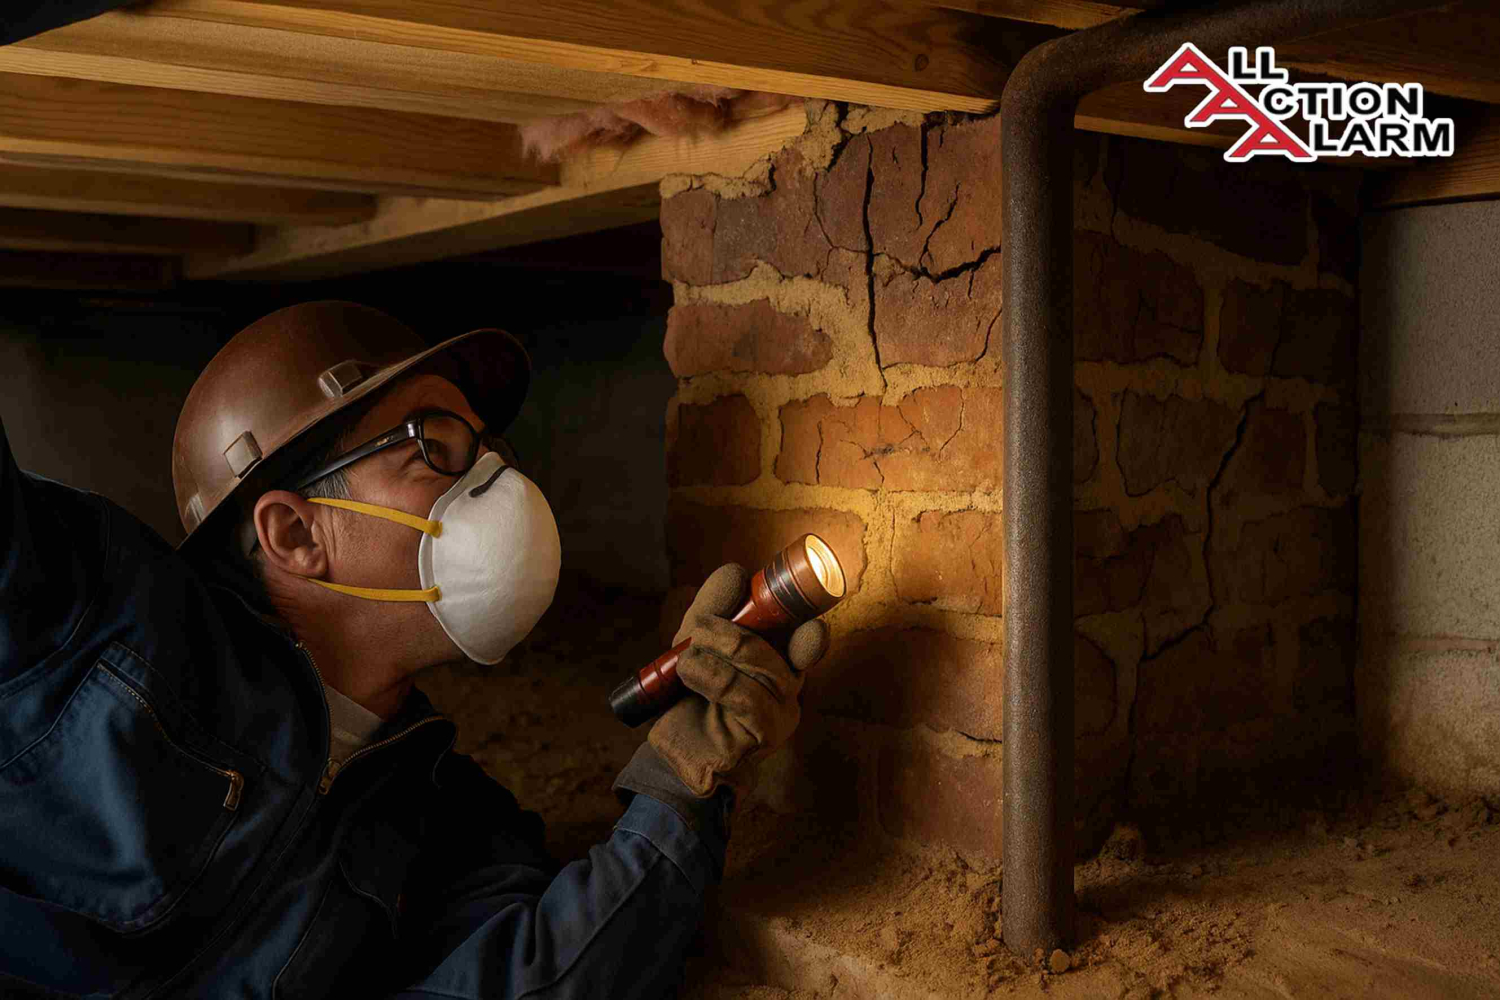
Let’s face it—crawl spaces aren’t exactly the most glamorous parts of a home, but they are incredibly important. They house essential systems like plumbing, wiring, and HVAC ductwork. But what really makes managing this space easier? An interior crawl space access door. Instead of heading outside to a sketchy door behind the bushes or hidden under your deck, an interior access point lets you reach your crawl space from the comfort and safety of your home.
Think of it like having an attic ladder inside instead of on the roof. It’s not just a matter of convenience—it’s about safety, maintenance, and even home efficiency. In this comprehensive guide, we’ll walk through everything you need to know about interior crawl space access doors—from types and installation tips to insulation, pest control, and even some clever concealment ideas. Ready to dive in? Let’s crawl before we walk.
What Is an Interior Crawl Space Access Door?
At its core, an interior crawl space access door is simply an opening inside your home that allows you to get into your crawl space. Unlike exterior doors, which are exposed to the elements and often located in hard-to-reach places, interior access doors are usually built into a closet floor, hallway, basement wall, or under stairs.
These doors are designed to be functional but can also be discreet. Some are hinged, while others are removable panels or even trapdoors built into your flooring. The main goal is to provide quick and easy access for homeowners, contractors, and inspectors to reach the crawl space when needed.
Besides offering convenience, interior access doors are often better protected from moisture, pests, and temperature extremes. They also tend to last longer since they’re not constantly exposed to rain, sun, or ice. Whether you’re planning to inspect pipes, check for mold, or just see what’s going on under your house, having this kind of door indoors makes life a whole lot easier.
Why You Need Interior Access to Your Crawl Space
You might be wondering, “Why bother cutting into my floor or wall for crawl space access?” Well, let’s break it down.
First, there’s convenience. No one wants to suit up and crawl around the backyard just to get under their house—especially in the middle of winter or during a thunderstorm. With an interior access point, you can pop open a door and handle business without ever stepping outside.
Then there’s maintenance. Crawl spaces require regular checkups—especially in older homes. You’ll want to inspect for moisture, mold, pest activity, or structural issues. Having an indoor door makes these tasks easier, meaning you’re more likely to stay on top of them.
Protection is another big factor. Exterior crawl space doors can be damaged by weather, allowing rain, snow, and pests to sneak in. An interior door, on the other hand, is much better protected and often lasts longer.
Finally, home efficiency plays a role. A properly sealed and insulated interior access door helps maintain your home’s temperature, keeping your heating and cooling bills lower. It’s a small addition that can make a big difference over time.
Types of Crawl Space Access Doors
When it comes to interior crawl space access doors, there’s no one-size-fits-all solution. Depending on your home’s layout, your aesthetic preferences, and how frequently you need access, there are several types of doors you can consider. Let’s break down the most common options.
-
Hinged Access Doors: These function just like a regular door. They’re often mounted vertically on a wall or horizontally on a floor and swing open with a handle or latch. They’re easy to operate and can be sealed tightly for insulation and pest control. This is a popular choice for utility rooms or basements where a traditional door appearance is desired.
-
Sliding Panels: These are great for tight spaces. If your access point is located in an area where a swinging door would be obstructive—say, under stairs or in a closet—sliding panels can be a lifesaver. They glide open sideways, offering quick access while staying low-profile.
-
Removable Covers: This is a common DIY-friendly option. These are flat panels that sit flush with the floor or wall and can be lifted off when access is needed. While they may not be the most convenient for frequent use, they’re simple and budget-friendly.
-
Trap Doors: These are built into the floor, typically with a handle or recessed pull ring. They’re ideal for closet floors or hallways, especially when you want to conceal the access door entirely. With good insulation and sealing, they can be very effective.
-
Custom-Built Solutions: Have a unique home layout? No worries. A custom door can be made to match your home’s interior, using the same materials and finishes as the surrounding area. These often include hidden hinges, flush handles, and even matching paint or wood stains for a seamless look.
Each of these door types comes with its own pros and cons. Think about how often you need to enter your crawl space, how visible the door will be, and whether insulation or security is a priority.
Ideal Locations for Installing Interior Crawl Space Access
Where should you put the access door? The answer depends on your home’s design and where your crawl space is located. But some spots just work better than others. Here are a few of the most practical and popular locations:
-
Closet Floors: This is probably the most discreet option. Closets are out of the way, not used as thoroughfares, and often have just enough floor space for a small access door. Whether it’s a linen closet or the bottom of a walk-in, you can hide your crawl space access without affecting your home’s appearance.
-
Utility Rooms or Laundry Areas: These are perfect because they’re already “functional” spaces in your home. If you’ve got plumbing, HVAC systems, or a water heater located in or near the crawl space, this location provides both aesthetic and practical benefits. Plus, you won’t mind a less-than-glamorous door being visible here.
-
Basement Walls: If your crawl space connects to a full or partial basement, installing an access door in the wall makes a lot of sense. It avoids the need to cut into your flooring and can offer a more traditional swinging-door approach.
-
Under Stairs: Got a staircase with wasted space underneath? You might be sitting on the perfect spot for a crawl space door. These hidden areas offer a natural cover, and the sloping shape is ideal for trap doors or angled panels.
The key here is balancing convenience with concealment. You want your crawl space to be accessible but not an eyesore. Also, consider how much room you’ll need when opening the door. Hinged options need clearance to swing open, while panels or trap doors can be more space-efficient.
Materials Used for Crawl Space Access Doors
The material you choose for your interior crawl space door can affect everything from durability and insulation to cost and aesthetics. Let’s take a closer look at your options:
-
Wood: This is the most common material, especially for DIYers. It’s readily available, easy to work with, and looks good when finished properly. However, wood is prone to warping in humid environments and may require sealing or painting to protect it.
-
Metal: For those who prioritize security and durability, metal doors—usually steel or aluminum—are a solid choice. They’re pest-resistant and hold up well over time, but they can be more expensive and may need extra insulation to prevent heat transfer or condensation.
-
Plastic or PVC: Lightweight and moisture-resistant, plastic access doors are often used in modular homes or for quick fixes. They’re not as sturdy as metal or wood, but they’re easy to clean and often come pre-insulated.
-
Composite Materials: These doors combine elements like fiberglass, foam insulation, and reinforced plastic. They’re designed for energy efficiency and longevity and are often used in homes where climate control is a concern. They tend to cost more but pay off in the long run with better performance.
-
Insulated Panels: Regardless of your base material, adding insulation is crucial. Rigid foam boards or fiberglass batts can be glued or framed inside the door to boost thermal performance and block moisture.
Consider how often the door will be used, your climate, and how well-sealed your crawl space already is. A good material choice not only improves durability but can also contribute to better energy efficiency and lower maintenance needs.
Step-by-Step Guide to Installing an Interior Crawl Space Access Door
Feeling handy? Installing an interior crawl space access door is totally doable if you’ve got the right tools and some basic carpentry knowledge. Here’s a simple step-by-step guide to help you get started:
Tools & Materials Needed:
-
Circular saw or jigsaw
-
Measuring tape
-
Drill & screwdriver
-
Framing lumber (2x4s)
-
Access door panel (pre-made or custom)
-
Screws, nails, and construction adhesive
-
Insulation and weather stripping
Step 1: Choose Your Location
Identify a flat, unobstructed area above your crawl space. Make sure there are no pipes, wiring, or support beams in the way. Closets, utility rooms, and hallway floors are ideal spots.
Step 2: Measure and Cut the Opening
Measure the width and length needed for your access door (at least 18” x 24” as per code in most areas). Mark the outline, then carefully cut through the flooring using a circular saw. Watch for debris, nails, or hidden wires.
Step 3: Frame the Opening
Use 2x4s to create a frame inside the cutout. This gives your door something solid to rest on and strengthens the surrounding floor or wall. Attach the frame securely with screws or nails.
Step 4: Install the Door
Fit the door or panel into place. If you’re using hinges, attach them to the frame and door, ensuring a snug fit. For lift-out covers, make sure the panel sits flush and secure. Add a handle or pull tab if needed.
Step 5: Insulate and Seal
Use rigid foam board or fiberglass to insulate the door. Apply weather stripping or rubber gaskets around the frame to prevent air leaks and block pests.
Step 6: Finish the Surface
Paint or stain the access door to match the surrounding area. Add trim or a floor mat to make it blend in better, especially if it’s in a visible spot.
There you go—you now have a safe, convenient, and energy-efficient way to get under your house. Just remember, when in doubt, call a pro to ensure everything is up to code.
Building Code Requirements and Safety Considerations
Before you break out the tools or hire someone to cut a hole in your floor, let’s talk building codes and safety. This isn’t the fun part, but it’s absolutely critical. Building codes exist to protect your home, your family, and future buyers. Failing to meet them could result in fines, failed inspections, or worse—unsafe conditions.
Minimum Size Requirements
According to the International Residential Code (IRC), crawl space access openings must be a minimum of 18 inches by 24 inches for floor openings, and 16 inches by 24 inches for wall openings. These minimums are designed to allow enough space for a person (or technician) to crawl through safely.
Clearance
There should be enough clearance inside the crawl space as well—typically at least 18 inches between the ground and the bottom of the floor joists. If your crawl space is tighter than that, you might need to make adjustments to meet accessibility standards.
Fire Safety
If your interior crawl space access door is located near any heating appliances (like a furnace or water heater), your local fire code may require fire-rated materials for the door. Metal or specially treated wood can help in these cases, but always check with your local building department to be sure.
Ventilation Rules
While this isn’t directly related to the door itself, it matters. Properly vented crawl spaces are less prone to moisture, mold, and poor air quality. Some codes require 1 square foot of venting per 150 square feet of crawl space area, unless you’re using a vapor barrier or conditioned crawl space model.
Child and Pet Safety
Don’t forget about the people (and animals) who live in your home. An unsecured crawl space opening can be a hazard to curious toddlers or pets. Consider childproof latches or even a lockable door to keep everyone safe.
Permits and Inspections
Depending on your jurisdiction, installing a crawl space access door might require a building permit—especially if you’re making structural changes to a load-bearing wall or floor. It’s worth checking in with your local building authority before you start swinging a hammer.
Bottom line? A little paperwork and research now can save you big headaches later. Plus, you’ll sleep better knowing your home is safe and up to code.
Insulation and Sealing: Keeping It Energy Efficient
Your crawl space might be out of sight, but it has a big impact on your home’s energy efficiency. That’s why insulation and sealing around your access door are so important. A poorly sealed door acts like an open window—letting in cold air, moisture, and pests. Let’s talk about how to fix that.
Why Insulation Matters
Insulating the access door helps maintain a consistent indoor temperature. Crawl spaces often harbor extreme temperatures—icy cold in winter, sweltering hot in summer. Without insulation, those temperatures can seep up into your home. Over time, this can raise your energy bills and make your floors feel drafty or uncomfortable.
Best Insulation Materials
-
Rigid Foam Board: Easy to cut and install, this is one of the most popular insulation options for crawl space doors. It provides high R-value with minimal thickness.
-
Spray Foam: Great for sealing gaps around the frame or in awkward corners. Just be careful—once it expands and hardens, it’s not easy to remove.
-
Fiberglass Batts: Budget-friendly and widely available, though not always the best for moist environments unless properly enclosed.
-
Insulated Access Panels: Some pre-made doors come with built-in insulation. These can save time and provide a clean, professional look.
Weather Stripping Tips
Don’t skip the sealing step. Once your door is insulated, use weather stripping around the frame to prevent air leaks. Look for:
-
Rubber gasket seals for a tight, compression fit
-
Foam tape for an easy, peel-and-stick solution
-
Threshold sweeps if the door opens to a standing position
Also, consider using caulk or silicone sealant around the perimeter of the door frame for extra protection.
Pro Tip: A sealed and insulated door doesn’t just help with energy efficiency—it also reduces the risk of condensation, mold, and even insect invasions.
Remember, every crack and gap in your crawl space door is a potential entry point for something you don’t want in your home. Seal it up right, and your comfort (and wallet) will thank you.
Pest Control Considerations for Access Doors
If there’s one thing pests love, it’s a warm, dark, undisturbed place like your crawl space. Rodents, termites, spiders, and even snakes have been known to make themselves at home down there. So if you’re installing an interior access door, it’s crucial to keep it sealed tight.
Common Pest Entry Points
Gaps around your crawl space access door are an open invitation. Mice can squeeze through a hole the size of a dime. Insects can crawl through even smaller cracks. Here’s how to close those gaps:
-
Use fine mesh screens on any ventilation points inside the crawl space.
-
Seal all gaps, cracks, and seams around the door frame with caulk or expanding foam.
-
Check that your weather stripping is intact and forms a full seal when the door is closed.
Rodent-Proofing Materials
-
Metal flashing: Install metal barriers or flashing around the inside of the frame to prevent chewing.
-
Steel wool: Stuff steel wool into any small crevices. Rodents hate it, and they can’t chew through it.
-
Heavy-duty plastic or PVC: Less attractive to insects and more resistant to water and gnawing.
Ongoing Maintenance
Make it a habit to check your access door every few months for signs of damage or intrusion:
-
Chew marks
-
Droppings
-
Loose weather stripping
-
Strange odors
If you spot any of the above, it’s time for a cleanup and possibly a call to a pest control professional.
Keeping critters out starts with good sealing, solid construction, and regular inspection. Don’t give them a single excuse to move in.
Waterproofing and Moisture Barriers
Water is the enemy of any crawl space. Once moisture gets in, it brings a host of problems—mold, mildew, wood rot, and even structural damage. That’s why waterproofing your crawl space access door is just as important as sealing it against pests or insulating it. Let’s walk through how to keep things high and dry under your home.
Why Moisture Control Matters
Crawl spaces are prone to humidity, especially in damp climates or homes with poor drainage. And if your access door isn’t sealed properly, that moisture can creep into your living space, leading to:
-
Warped flooring
-
Musty odors
-
Reduced air quality
-
Damage to insulation and wiring
Moisture doesn’t always come from the outside, either. Condensation from unsealed HVAC ducts or water lines in the crawl space can create the same havoc. So a proper barrier around the access point is key.
How to Waterproof the Door Area
Start by installing a vapor barrier in your crawl space if one isn’t already present. This is typically a thick plastic sheeting (6-mil or thicker) laid directly over the ground and sealed at seams and edges. Then focus on the access point itself:
-
Seal the frame: Use silicone caulk or foam sealant around the edges of the frame to prevent water intrusion.
-
Install a door gasket: A waterproof gasket between the door and frame creates a tight seal that keeps moisture out.
-
Elevate the door: If the access is through the floor, build a small curb or raised frame around the opening to prevent water from pooling at the threshold.
-
Use waterproof materials: Choose composite or treated wood for the access door. Even better, opt for insulated metal or PVC panels that resist water and won’t warp or swell.
Pro Tip: If your crawl space has ongoing moisture issues, consider adding a dehumidifier or sump pump system. Keeping humidity levels low is the ultimate long-term solution.
You’ve probably heard the saying: “An ounce of prevention is worth a pound of cure.” Nowhere is that more true than with crawl space waterproofing. Do it right once, and save yourself a world of trouble down the line.
Security and Locking Options
An interior crawl space door might not seem like something that needs security features—but think again. If you’ve got valuables stored in your crawl space, want to keep children or pets out, or simply want peace of mind, adding a locking mechanism makes perfect sense.
Why Add a Lock?
While most crawl spaces don’t contain treasure chests or secret vaults, they often hold things you want to protect:
-
Plumbing and HVAC systems
-
Electrical panels
-
Insulation or stored items
-
Areas prone to pests
Plus, if you’re in a multi-unit building or rent out part of your home, you might want to prevent unauthorized access to this space.
Types of Crawl Space Door Locks
-
Cam Locks – These are simple twist-style locks that can be installed into a flush panel or trap door. Best for low-security needs.
-
Barrel Bolts – Slide-style locks that work well on hinged doors. Add one to the top and bottom for extra strength.
-
Latch-and-Padlock Systems – These allow you to add your own padlock. Ideal if you want to lock it up tight without a built-in key system.
-
Keyed Entry Locks – For a cleaner, more finished look. These are built into the door, similar to interior doorknobs.
-
Childproof Latches – Perfect if your crawl space door is within reach of curious kids. These prevent accidental entry while still allowing easy access for adults.
Installation Tips
-
Make sure your door closes snugly before adding a lock. A poor fit won’t hold under pressure.
-
Use longer screws and reinforce the door frame to prevent forced entry.
-
Don’t forget ventilation—don’t seal the door so tightly that the crawl space can’t breathe if it needs to.
Locking your crawl space access door is a small upgrade with a big impact on safety and peace of mind.
Maintenance Tips for Interior Crawl Space Doors
Your interior crawl space door may not be the centerpiece of your home, but it still deserves some attention now and then. Like anything else, it can wear out, shift, or become less effective over time. Luckily, keeping it in good shape is pretty easy.
Inspect Regularly
Once every 3 to 6 months, give your access door a quick check. Look for:
-
Cracks or warping in the panel
-
Loose hinges or screws
-
Gaps in weather stripping or insulation
-
Signs of pests (droppings, chewed materials)
-
Moisture buildup or mold near the frame
Clean the Area
Dust and debris can build up around the access point, especially if it’s located on the floor. Sweep or vacuum the area and wipe down the door with a damp cloth.
Lubricate Moving Parts
If your door has hinges or a lock, apply a little silicone spray or graphite lubricant to keep things moving smoothly.
Check the Seal
Over time, weather stripping can lose its shape or adhesive. Replace it if it starts to peel or no longer forms a tight seal when the door is closed.
Touch-Up the Finish
Painted or stained doors can fade, chip, or get scratched over time—especially if they’re in a high-traffic area. A quick touch-up every year or so keeps them looking good and helps prevent moisture from penetrating the material.
When to Replace It
If your crawl space door is warped, damaged, or no longer closes tightly, it may be time for a replacement. Materials like untreated wood can degrade quickly in humid environments, and once the seal is broken, you risk energy loss and pest intrusion.
A little maintenance now saves a lot of hassle later. Think of your access door like the gate to your home’s underbelly—keep it sturdy, sealed, and secure.
DIY vs. Professional Installation
So, you’ve decided to install or upgrade your interior crawl space access door. Great! Now comes the big question: should you tackle it yourself or call in a pro? Let’s compare the two options so you can make the right choice for your home, budget, and skill level.
DIY Installation: The Pros and Cons
Pros:
-
Cost Savings: Doing it yourself can save hundreds of dollars in labor.
-
Custom Fit: You control every step, so you can tailor the project to your exact space and preferences.
-
Satisfaction: There’s nothing quite like the pride of finishing a project with your own two hands.
Cons:
-
Skill Required: You’ll need some basic carpentry knowledge, and mistakes can lead to costly repairs.
-
Time-Consuming: Expect to spend several hours (or even a full weekend) getting it just right.
-
Tool Investment: If you don’t already have a circular saw, drill, level, and other essential tools, you might end up spending more than you planned.
Professional Installation: The Pros and Cons
Pros:
-
Expertise: A contractor will know how to handle tricky issues like framing, insulation, and moisture sealing.
-
Speed: Most pros can knock this out in a day or less.
-
Code Compliance: A licensed contractor is familiar with local codes and can make sure your access meets all requirements.
Cons:
-
Higher Cost: Labor isn’t cheap. You might spend $300 to $800 or more depending on complexity.
-
Less Customization: You may be limited by the contractor’s materials and design style unless you clearly specify your needs.
When to DIY vs. Hire a Pro
Go DIY if:
-
You’re handy with tools and comfortable cutting into flooring or walls.
-
The project is straightforward and doesn’t require structural changes.
-
You have the time and patience to do it right.
Hire a Pro if:
-
You need to cut into a load-bearing wall or floor.
-
You’re dealing with electrical/plumbing obstructions.
-
You want a completely concealed or custom design.
-
Your crawl space has serious moisture or pest issues.
It all comes down to your comfort level and the complexity of the job. A simple access door? Go for it. But if you’re staring at joists, wiring, and HVAC ductwork—maybe it’s time to let the pros handle it.
Cost Breakdown: Budgeting for Crawl Space Access
Whether you’re building a brand new access door or upgrading an old one, knowing the costs involved helps you avoid surprises. Let’s look at a full breakdown of typical expenses, including materials, tools, labor, and extras.
DIY Cost Estimate
| Item | Estimated Cost |
|---|---|
| Access panel/door | $40 – $150 |
| Lumber for framing | $15 – $40 |
| Hinges and hardware | $10 – $25 |
| Insulation materials | $20 – $60 |
| Weather stripping & sealant | $15 – $30 |
| Paint or stain | $10 – $25 |
| Tools (if not already owned) | $100 – $300+ |
| Total (DIY) | $100 – $300+ |
Professional Installation Cost Estimate
| Item | Estimated Cost |
|---|---|
| Labor (flat fee or hourly) | $200 – $600 |
| Access door and materials | $100 – $300 |
| Custom design or trim work | $100 – $250 |
| Total (Pro Install) | $400 – $1,000+ |
Factors That Can Increase Cost:
-
Custom-sized doors
-
Insulated or fire-rated doors
-
Hard-to-reach crawl space locations
-
Framing in concrete or brick walls
Money-Saving Tips:
-
Buy a pre-made access door kit
-
Reuse materials like leftover wood or hinges
-
Shop sales or use reclaimed building materials
No matter your budget, there’s a solution out there. Just keep in mind that cheaping out on sealing or insulation may cost you more in energy bills or pest control down the line.
Creative Ideas for Concealing Your Crawl Space Access Door
Sure, your crawl space access door serves a function—but that doesn’t mean it has to be an eyesore. With a little creativity, you can conceal it beautifully and make it blend into your home’s design. Here are some stylish, practical, and downright clever ideas.
1. Rug or Carpet Overlay
If your access door is in the floor of a closet, hallway, or living area, just place a rug or carpet square over it. It hides the panel completely and can be pulled back when needed.
2. Built-In Furniture
Got a low cabinet or bench? Build the access into the base. You can lift the top or slide out a hidden drawer to reveal the crawl space door. Perfect for entryways or mudrooms.
3. Trapdoor with Recessed Handle
A flush-fitting trapdoor with a recessed pull ring or finger hole sits nearly invisible in a hardwood or laminate floor. Finish it to match the flooring for a seamless look.
4. Faux Paneling or Wainscoting
If your crawl space access is in a wall, add wainscoting or faux panels to hide it in plain sight. Use a magnetic latch and hidden hinges so it opens cleanly without visible hardware.
5. Closet Floor Hatch
Installing your door inside a linen or coat closet? That’s already half the disguise. Add a hatch that matches the closet floor and use a pull-up ring to lift it when needed.
6. Picture Frame or Wall Art Cover
This one’s clever—hinge a large picture frame over the door and swing it open when access is needed. Ideal for wall-mounted crawl space panels.
These ideas not only improve the appearance of your home but also maintain the functionality of your crawl space access. No more ugly plywood or bare holes—just smart, stylish solutions that work.
Common Mistakes to Avoid During Installation
DIY can be fun and rewarding, but it’s also easy to make mistakes if you’re not careful. Crawl space access doors are simple in theory, but one wrong move could compromise your home’s insulation, structure, or even safety. Here are the most common pitfalls to watch out for—and how to avoid them.
1. Poor Measurement
One of the biggest mistakes is cutting too small (or too large) of an opening. Always measure twice—and don’t forget to leave clearance for framing and sealing. Use a level to ensure everything lines up straight.
2. Weak or Incomplete Framing
An access door without a proper frame can sag, creak, or even damage the surrounding floor or wall. Frame the opening with 2x4s or another sturdy material before installing the panel.
3. No Insulation or Seal
This one’s a dealbreaker. A door without insulation or weather stripping will let in cold air, pests, and moisture. Don’t cut corners—spend a little more now to save a lot later.
4. Using the Wrong Materials
Untreated wood can absorb moisture and warp. Thin plastic panels may crack. Always use materials rated for interior, potentially humid conditions—bonus points if they’re insulated.
5. Ignoring Building Codes
Skipping code requirements might save time upfront, but it can backfire when it’s time to sell your home or file an insurance claim. Check for minimum size, ventilation, and fire safety rules before you begin.
Avoiding these mistakes doesn’t require expert-level skill—just a little research, patience, and attention to detail. Get it right the first time, and your crawl space access door will serve you well for years.
Conclusion
An interior crawl space access door might not be the most glamorous upgrade, but it’s one of those unsung heroes of smart homeownership. It brings together convenience, safety, energy efficiency, and functionality—all in one low-key panel or hatch.
Whether you’re choosing the perfect location, picking materials, insulating for energy savings, or getting creative with concealment, there’s no shortage of ways to get it done right. From weekend DIYers to pros with blueprints, anyone can add (or upgrade) crawl space access with the right knowledge.
Don’t overlook this simple addition—it just might become one of the most useful features in your home.
FAQs
1. What is the standard size for a crawl space access door?
The IRC requires a minimum of 18” x 24” for floor openings and 16” x 24” for wall openings. However, larger doors make access easier, especially for repairs or inspections.
2. Can I install an interior access door in an older home?
Yes! Older homes may not have pre-built access, but you can create one. Just be sure to avoid cutting into structural components and check for plumbing or wiring.
3. How do I keep my crawl space door from warping?
Use moisture-resistant materials like treated wood, PVC, or insulated composite panels. Proper sealing and insulation are also key to preventing warping from humidity.
4. Are there building codes for crawl space access?
Absolutely. Codes cover everything from minimum size and ventilation to fire safety and insulation. Always check with your local building authority before starting work.
5. Is it necessary to insulate an interior crawl space access door?
Yes. A well-insulated door helps regulate temperature, prevent condensation, and reduce energy loss—especially in homes with HVAC ducts running through the crawl space.
About All Action Alarm: Your Trusted Partner in Home Security Solutions
When it comes to protecting your home and loved ones, there’s no room for compromise. At All Action Alarm, we take home security to the next level by offering top-tier protection with cutting-edge technology and expert monitoring services that you can rely on. As a leader in the security industry, we’re committed to keeping homes and businesses safe, providing peace of mind 24/7.
Check out Home Automation Systems and Get Started with All Action Alarm Today!
Don’t wait for an emergency to take action. Protect your home and family with the best in the business. Call (631) 549-7225 to schedule your consultation, or visit allactionalarm.com to learn more about our services.
Your safety is our top priority.

