
Access Master Garage Door Remote: Complete Setup, Programming, Troubleshooting, and Buying Guide
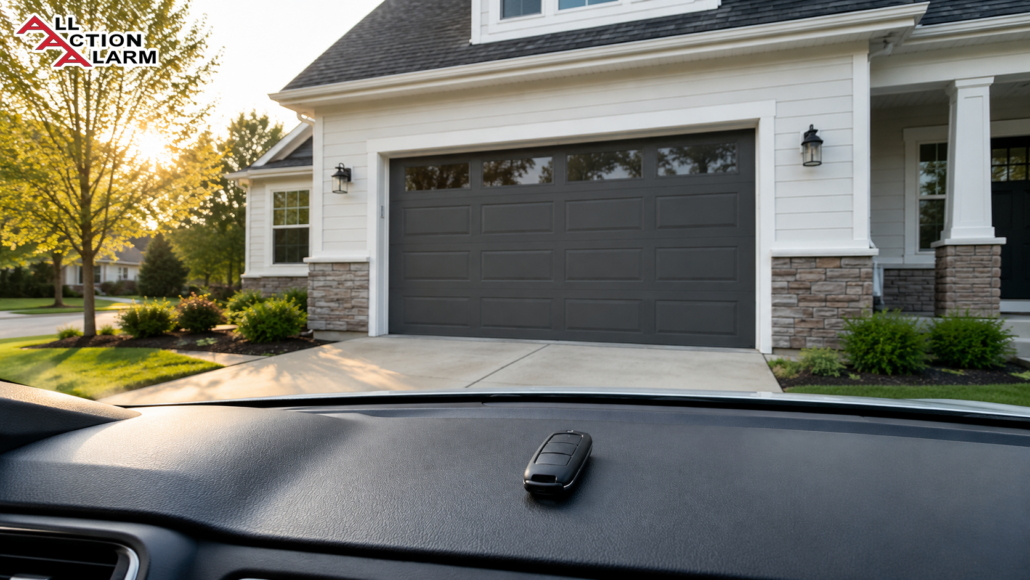

An Access Master garage door remote is one of those little devices you barely think about until the day it stops working. One minute you are pulling into the driveway, tapping the button like you have done a thousand times, and expecting the garage door to glide open like a theater curtain. The next minute, nothing happens. No hum, no click, no friendly movement from the door. Suddenly, that small remote on your visor or keychain becomes the most important gadget in your house. That is exactly why understanding how your Access Master remote works, how to program it, how to troubleshoot it, and when to replace it can save you time, money, and a lot of unnecessary frustration.
The name Access Master is commonly associated with residential garage door openers and remotes that share similarities with other major garage door opener families, especially systems connected to brands like LiftMaster, Chamberlain, and Craftsman. Because many homeowners inherit garage systems when they buy a house, they often do not know the original model number, the remote type, or even whether the remote in their hand is the correct one. That confusion is normal. Garage door opener technology has changed over the years, and older dip-switch remotes, newer rolling-code remotes, visor remotes, keychain remotes, wireless keypads, wall controls, and smart openers can all look deceptively similar from the outside.
This guide walks through everything in plain English. You will learn what an Access Master garage door remote is, how the opener receives the signal, how to find the correct replacement remote, how to program it using the learn button, and what to do when the remote refuses to cooperate. Think of this as a practical homeowner’s map, not a dry technical manual. A garage door remote may seem simple, but the system behind it has a few moving parts, and once you understand those parts, troubleshooting becomes much less mysterious. Instead of pressing the button twenty times and hoping for magic, you will know exactly where to look and what to fix.
What Is an Access Master Garage Door Remote?
An Access Master garage door remote is a handheld or clip-on transmitter that sends a wireless signal to your garage door opener, telling it to open, close, or sometimes control a second or third door. Most homeowners use it from inside a car, which is why visor-style remotes are so common. Others prefer a compact keychain garage door remote because it travels with their keys and is harder to forget. No matter the shape, the basic job is the same: the remote sends a coded command, the opener’s receiver recognizes it, and the motor activates the garage door system. When everything is synced properly, the whole process feels instant and effortless.
The important thing to understand is that not every remote works with every opener. Garage door remotes are not like universal TV remotes where you can simply guess your way through a few codes and hope something sticks. Compatibility depends on the opener’s technology, the radio frequency, the security system, the age of the motor unit, and sometimes even the color of the learn button on the opener. That small colored button hidden near the antenna wire or light cover is often the key to knowing which remote will pair successfully. If you buy the wrong replacement remote, it may look perfect in your hand but still do absolutely nothing when you try to program it.
Many Access Master systems were installed years ago, so homeowners often deal with a mix of old and new technology. You might have an older opener that still works beautifully but needs a replacement remote because the original was lost, cracked, or worn out. Or you might have a remote that opens the door only when you are standing two feet away from the garage, which usually points to a weak battery, signal issue, antenna problem, or interference nearby. In some cases, the remote is fine, but the opener’s memory has reached its limit or needs to be cleared and reprogrammed. That is why diagnosing the issue step by step matters.
The remote itself is only one piece of the garage access system. The full setup can include the motor unit, rail, trolley, safety sensors, wall control, wireless keypad, emergency release, antenna, receiver logic board, and door hardware. When you press the remote button, you are starting a chain reaction across that system. The opener checks the signal, confirms the code, powers the motor, moves the trolley, and lifts or lowers the door. So when something goes wrong, the remote might be the culprit, but it is not always the only suspect. A smart homeowner learns to look at the entire system before tossing the remote in a drawer and ordering a new one.
Why Access Master Remotes Are Often Linked With LiftMaster and Chamberlain
Access Master remotes are often discussed alongside LiftMaster, Chamberlain, and sometimes Craftsman garage door opener products because many opener systems share similar manufacturing roots, receiver technologies, and programming styles. For a homeowner, this connection can be helpful but also confusing. You may search for “Access Master replacement remote” and see compatible models listed under other brand names. That does not always mean the listing is wrong. In many cases, the real question is not the brand printed on the remote but whether the remote supports the same security technology and learn-button type as your opener.
This is why the learn button matters so much. Many compatible garage door opener systems use colored learn buttons such as purple, red/orange, green, or yellow to indicate the technology generation. For example, a remote made for a newer Security+ 2.0-style opener generally will not pair with a much older dip-switch opener unless it is specifically designed as a universal model that supports both. The brand name on the shell can mislead you, but the model number and compatibility chart usually tell the real story. That little label on the back or side of your garage door opener motor is like the opener’s birth certificate. It usually includes the model number, manufacturing information, and sometimes frequency or security details.
The connection between these brands also explains why some homeowners successfully use a Chamberlain or LiftMaster-branded replacement remote with an Access Master opener. It is not because the remote is magically universal; it is because the opener and remote speak the same electronic language. Imagine trying to use a key from one lock in another lock. If the cut pattern matches, the key works, even if it has a different logo stamped on it. Garage remotes operate the same way, except the “cut pattern” is digital. The opener must recognize the remote’s code, and both devices must be designed for the same communication system.
Still, you should never assume compatibility based only on appearance. Two remotes can look almost identical but use different internal technology. One might work with a purple learn button, while another may be intended for a yellow learn button. One may support three doors, while another may control only one. One may pair with your vehicle’s built-in HomeLink system, while another may need a repeater depending on the opener generation. Before buying, check your opener model number, inspect the learn button, read the remote’s compatibility notes, and avoid vague product descriptions that promise “works with most openers” without explaining which ones. That small bit of homework can prevent a lot of returns.
How Access Master Garage Door Remote Systems Work
An Access Master garage door remote system works by using a transmitter and receiver. The remote is the transmitter. The garage door opener contains the receiver, usually built into the logic board inside the motor unit. When you press the button, the remote sends a radio signal that carries a specific code. The opener listens for that signal through its antenna wire. If the received code matches a code stored in the opener’s memory, the opener activates the motor. If the code does not match, the opener ignores the command. That simple yes-or-no decision is what keeps your neighbor’s remote from opening your garage door every time they come home.
Older garage door remotes often used dip switches. These were tiny switches inside the remote and opener that had to be set in matching positions. If the pattern matched, the door opened. The upside was simplicity; the downside was security. Someone with access to the switch pattern could copy the setup. Newer remotes use more advanced coded systems, including rolling-code technology. Instead of sending the exact same code every time, a rolling-code remote changes the access code after each use. The opener and remote stay synchronized, almost like two people agreeing on a new secret handshake every time they meet. That makes code grabbing and unauthorized duplication much harder than with older fixed-code systems.
Range is another part of how the system works. A healthy remote and opener should usually respond from a reasonable driveway distance, but walls, metal doors, LED light bulbs, electrical devices, battery condition, and antenna placement can all affect performance. If your remote only works when you are standing directly under the opener, the signal is being weakened or blocked somewhere. The antenna wire hanging from the opener should usually be visible and unobstructed. It should not be wrapped tightly around metal parts, shoved into the motor housing, or cut short. A remote signal is a bit like a radio station in your car: the stronger and cleaner the reception, the smoother everything works.
The opener also uses safety systems after receiving the command. If you press the remote to close the door, the opener checks the travel limits, force settings, and photo-eye safety sensors. If the safety sensors are blocked or misaligned, the door may refuse to close or may reverse after moving downward. This can make people blame the remote when the remote is actually doing its job perfectly. The signal reaches the opener, but the opener refuses to complete the close cycle for safety reasons. That is why troubleshooting should separate “remote signal problem” from “door movement problem.” If the wall button works but the remote does not, focus on the remote system. If neither works correctly, look deeper into the opener or door hardware.
Learn Buttons, Radio Signals, and Rolling Codes Explained
The learn button is the small button on the garage door opener that tells the unit to accept a new remote, keypad, or wireless control. On many Access Master-style openers, it is located on the back or side of the motor unit, often near the antenna wire or behind a light lens cover. When you press the learn button, the opener enters a short programming window. During that window, you press the button on the remote you want to use. The opener stores the remote’s code in memory, and from then on, it responds to that remote. Some units confirm successful programming with a click, flashing light, or blinking indicator.
The color of the learn button can tell you a lot about compatibility. Different opener generations used different radio frequencies and security systems, and manufacturers often used button color as a quick visual clue. A yellow learn button may indicate a newer generation of rolling-code technology, while purple, red/orange, or green learn buttons may belong to older generations. This is not something to guess casually, because the wrong remote may never pair no matter how many times you repeat the programming steps. The learn button is like the opener’s accent. Your remote has to speak the same dialect, or the conversation goes nowhere.
Rolling-code technology is one of the biggest improvements in garage door remote security. In a fixed-code system, the same code is transmitted every time, which is simple but less secure. In a rolling-code system, the remote and opener use an algorithm to change the code after every successful operation. The opener expects the next valid code in the sequence, and random old codes are rejected. This is why a copied signal from yesterday should not work today. For everyday users, rolling code is invisible. You just press the button and the door moves. Behind the scenes, though, the remote and opener are doing a tiny security dance every time.
Radio interference can interrupt that dance. Many garage door remotes operate in common residential frequency ranges, and nearby electronics can sometimes create noise that weakens the signal. Certain LED bulbs installed in the opener, battery chargers, security systems, routers, landscape lighting transformers, and even nearby construction equipment can create interference in some situations. When interference is present, the remote may work inconsistently. It might open the door in the morning but fail at night, work from one side of the driveway but not the other, or work only after several button presses. Before replacing expensive parts, it is smart to test simple variables: change the remote battery, unplug nearby devices temporarily, remove suspect LED bulbs from the opener, and check whether the remote works better close to the motor unit.
Choosing the Right Access Master Garage Door Remote
Choosing the right Access Master garage door remote replacement starts with identification. Do not begin with the remote in your hand; begin with the opener on the ceiling. Climb safely on a sturdy ladder, inspect the motor unit, and find the model number sticker. Also locate the learn button and note its color. This information is far more reliable than guessing from the remote’s shape. Many visor remotes look alike because manufacturers use similar cases across different models. The plastic shell is not the real compatibility marker. The internal radio system is what matters.
Once you know the opener model and learn-button color, you can decide whether you need an original-style remote, a compatible replacement remote, or a universal remote. Original-style remotes are usually the easiest choice when available because they are designed for the opener’s system. Compatible replacements can also work well, especially if they clearly list your opener technology. Universal remotes can be convenient when you have multiple garage doors from different brands or an older opener with limited replacement options. The key is to buy a remote that clearly supports your specific opener generation. A vague listing with pretty photos but no compatibility details is a red flag.
You should also think about how you use the garage. A single-button remote may be enough if you only have one door. A three-button remote makes more sense if you have multiple garage doors, a gate opener, or a detached garage. A keychain remote works well for renters, family members, dog walkers, or anyone who does not always drive the same vehicle. A visor remote is better for drivers who want quick access without searching through pockets or bags. A wireless keypad is not technically the same as a remote, but it can be a great add-on because it lets you open the garage with a PIN code when you do not have the remote nearby.
Price should not be the only deciding factor. Cheap remotes can be tempting, but poor-quality buttons, weak signal range, unclear instructions, and questionable compatibility can turn a bargain into a headache. A garage door remote is a small security device connected to one of the largest entry points in your home. You do not need to overspend, but you should buy from a seller that gives clear model compatibility, programming instructions, return options, and realistic product details. When in doubt, match by opener model number and learn button first, then choose the remote style that fits your daily routine.
Match Your Opener Model, Frequency, and Button Color
The best way to match an Access Master remote is to gather three pieces of information: the opener model number, the learn button color, and the remote technology or frequency when available. The opener model number is usually found on a label attached to the motor housing. Depending on the unit, the label may be on the back, side, or under the light cover. Write it down exactly, including letters and numbers. Small differences in model numbers can matter. A missing suffix or mistaken digit may point you to the wrong replacement remote.
The learn button color is often the fastest clue. You may see yellow, purple, red/orange, green, or another color depending on the opener generation. Near that button, there is often a small LED indicator and a hanging antenna wire. This area is the programming center of the opener. When shopping for a replacement, many product listings say something like “compatible with purple learn button” or “works with yellow learn button openers.” That is why the color is useful. It gives you a quick compatibility filter before you even dig into the full model chart.
Frequency can matter too, especially with older systems. Some older remotes used fixed frequencies and dip-switch coding, while newer ones use rolling-code technology. A remote built for one frequency will not magically transmit on another. This is like trying to tune a radio to a station that is broadcasting on a different channel. You can press the button forever, but the opener will not hear the right signal. If your opener manual or label lists a frequency, compare it carefully with the remote’s specifications. If the product information does not mention compatibility in a clear way, choose another listing or consult the opener manual.
It is also worth checking whether your opener uses dip switches. If you open the old remote and see a row of tiny numbered switches, you may have an older fixed-code system. In that case, programming may involve matching switch positions rather than pressing a learn button. Some universal remotes support dip-switch openers, but not all do. If your system has both a learn button and older-style coding, follow the instructions for that exact opener model. The safest rule is simple: match the technology, not just the brand. The right remote will pair quickly. The wrong remote will waste your afternoon.
Universal Remotes vs Original Replacement Remotes
A common question homeowners ask is whether they should buy a universal garage door remote or an original replacement remote. Both can be good choices, but they serve slightly different needs. An original replacement remote is designed for a specific family of openers. It usually offers the smoothest programming experience, predictable range, and button behavior that matches the original unit. If you are replacing a lost or broken Access Master remote and you know the opener model, an original-style compatible remote is often the cleanest option. It is like replacing a missing car key with one made for that exact vehicle.
A universal remote is more flexible. It can support multiple brands, multiple learn-button colors, and sometimes older dip-switch systems. This is helpful if you have one remote controlling a main garage, a detached garage, and maybe a gate. Universal remotes are also useful when the original remote model is discontinued or hard to find. The trade-off is that setup can be slightly more involved. Instead of one simple programming method, universal remotes may require selecting a brand mode, pressing a sequence of buttons, matching dip switches, or cycling through opener types until the correct signal is found. The instructions matter a lot.
Here is a simple comparison to make the decision easier:
| Remote Type | Best For | Main Advantage | Possible Drawback |
|---|---|---|---|
| Original replacement remote | Homeowners with a known opener model | Easier compatibility and programming | May cost more or be harder to find for older units |
| Compatible branded remote | Similar opener families with matching technology | Good balance of price and fit | Must verify learn-button color and model support |
| Universal remote | Multiple doors, mixed brands, older openers | Flexible and widely available | Programming can be more confusing |
| Keychain remote | Shared access and everyday portability | Easy to carry and hard to leave in the car | Smaller buttons and easier to misplace |
The decision comes down to confidence and convenience. If you know your opener model and can find the exact compatible remote, choose that. If your household has several different openers or your original model is no longer easy to buy, a universal remote may make more sense. Just avoid the mistake of buying the cheapest “universal” remote without reading the compatibility details. Universal does not always mean truly universal. It means the remote supports several systems, not every garage door opener ever made. A few minutes of checking can save you from the classic garage-door-owner ritual of standing under the opener, pressing buttons, muttering, and wondering why nothing works.
How to Program an Access Master Garage Door Remote
Programming an Access Master garage door remote is usually simple when you have the correct remote and a working opener. Most modern systems use the learn-button method. The basic idea is to tell the opener, “Get ready to remember a new remote,” and then send a signal from that remote. The opener stores the code, and the remote becomes authorized. It sounds technical, but in practice it is often less complicated than pairing Bluetooth headphones. The difference is that garage openers usually give you a short programming window, so you need to be ready before pressing the learn button.
Before starting, stand safely and make sure the garage door area is clear. Move cars, tools, bikes, pets, and people away from the path of the door. A garage door is heavy, and even though modern openers include safety features, you should never treat a moving door casually. Have the remote in your hand, know which button you want to program, and locate the learn button on the motor unit. If the opener has a light lens covering the learn button, remove or open it carefully. Do not yank wires, touch exposed electrical components, or stand on an unstable chair. Use a proper ladder and keep one hand steady.
The programming sequence often goes like this: press and release the learn button on the opener, then press and hold the desired button on the remote until the opener light flashes or you hear a click. After that, test the remote from a safe distance. If it works, you are done. If it does not, repeat the process slowly. Timing matters. Holding the learn button too long can erase the opener’s memory on some systems, which is not what you want unless you are intentionally clearing all remotes. A quick press and release is usually the goal for adding a remote.
If programming fails, do not panic. The most common reasons are wrong remote compatibility, weak remote battery, missed timing window, full opener memory, interference, or accidentally using the wrong button sequence for a universal remote. Try a new battery first because it is cheap and easy. Then confirm the remote is compatible with the learn-button color and opener model. If you are using a universal remote, read the instructions carefully because the first step may not be the opener’s learn button. Some universal remotes must be set to the correct brand mode before the opener can learn them. Programming is not about force; pressing harder will not help. It is about matching the right steps in the right order.
Programming With the Learn Button
To program with the learn button, begin by locating the button on the garage door opener motor unit. It is often near the antenna wire, which may hang down from the opener. The button may be colored, and there is often a small indicator light beside it. Press and release the learn button. Do not hold it down unless your manual specifically tells you to clear memory. After pressing it, the indicator light usually turns on or begins blinking, which means the opener is ready to receive a remote signal. You typically have a short period to complete the next step.
Now press the button on the remote that you want to use for that door. Hold it for a moment and watch or listen for confirmation. Many openers flash the garage light, click, or move slightly to indicate the remote has been accepted. Once confirmed, release the remote button and wait a few seconds. Then press the remote again to test whether the door responds. If the door opens or closes, programming worked. If the light flashed but the door did not move, check whether the opener is locked, the door is disconnected from the trolley, or the safety system is preventing movement.
For multi-button remotes, program one button at a time. If you have two garage doors, press the learn button on the first opener, then press the remote button you want assigned to that door. After testing it, repeat the process with the second opener and a different remote button. Do not press multiple remote buttons randomly during programming. That can create confusion, especially if the same remote is controlling multiple devices. Think of each remote button as a separate key. You are deciding which lock each key should open.
If programming still does not work, clear thinking beats repeated button pressing. Replace the remote battery, stand closer to the opener, confirm the opener has power, and check the learn-button color against the remote’s compatibility. Also inspect the opener’s antenna wire. If it is tucked inside the housing or damaged, the opener may not receive the signal well. If you recently installed LED bulbs in the opener and the remote range suddenly dropped, test the opener with those bulbs removed. Some bulbs can interfere with remote signals. Small details like that can make the difference between a remote that feels dead and one that works perfectly again.
Programming a Keychain Remote, Wall Button, or Vehicle HomeLink
A keychain garage door remote usually programs almost the same way as a visor remote. The difference is the size and sometimes the button layout. Because keychain remotes are small, it is easier to accidentally press the wrong button or hold two buttons at once. Before programming, identify the button you want to assign. If the remote controls multiple doors, pick a logical pattern, such as top button for the main garage and bottom button for the side garage. After pressing the opener’s learn button, press the chosen keychain remote button until the opener confirms pairing. Then test it from both inside and outside the garage.
A wireless wall button or wireless keypad may follow a related but slightly different process. A keypad usually requires you to create or enter a PIN, press a program button, and then pair it with the opener. The keypad is helpful because it allows entry without a handheld remote. Families often use it for kids coming home from school, guests, contractors, or emergency access. However, a keypad should be treated as a security device, not a convenience toy. Choose a PIN that is not obvious, avoid birthdays or house numbers, and change it when someone no longer needs access.
Vehicle systems such as HomeLink can be a little trickier because the car has to learn the remote signal and, in many cases, the opener also has to learn the car. A typical process involves clearing old HomeLink codes in the vehicle, holding the original remote near the HomeLink buttons, pressing both buttons until the vehicle indicator changes, and then pressing the garage opener’s learn button to complete the pairing. Newer opener technologies may require a compatibility bridge or repeater for older vehicles. This is one of those situations where the vehicle manual and opener manual both matter because you are connecting two separate systems that were made to talk through a shared protocol.
When programming any device, keep security in mind. Do not program remotes you do not control. Do not leave spare remotes in unlocked cars parked outside. Do not give permanent keypad access to temporary workers unless you plan to change the code afterward. A garage door often leads directly into the home, and even detached garages usually contain tools, bikes, vehicles, and stored belongings. Convenience is great, but it should not come at the cost of easy unauthorized access. A properly programmed remote gives you smooth entry; a carelessly managed remote can become a hidden vulnerability.
Troubleshooting an Access Master Remote That Won’t Work
When an Access Master remote won’t work, the first step is to figure out whether the problem is the remote, the opener, the door, or the environment. Start with the wall control. If the wall button opens and closes the door normally, the motor and door system are probably functioning, and the problem is more likely related to the remote signal. If the wall button also fails, the issue may be power, opener lock mode, safety sensors, wiring, travel limits, motor problems, or door hardware. This simple test immediately cuts the mystery in half. It is like checking whether a lamp is broken or just unplugged before buying a new bulb.
Next, replace the remote battery. Even if the indicator light on the remote still glows, the battery may be too weak to send a strong signal. Garage remote batteries can fade gradually, causing short range before total failure. You may notice the remote works only when you are close to the door, or only after several presses. Use the correct battery type and install it in the right direction. Clean any corrosion from the battery contacts gently. If the remote was dropped, rained on, or left in extreme heat, inspect the case and buttons for physical damage.
Then test range and consistency. Stand near the opener and press the remote. If it works up close but not from the driveway, you likely have a range problem rather than a programming problem. Check the antenna wire hanging from the motor unit. It should be visible and not wrapped around metal. Try removing LED bulbs from the opener temporarily, especially if the problem began after changing bulbs. Unplug nearby electronics one at a time to see whether interference is affecting the signal. Garage door remote range problems can feel random, but they often have a physical cause hiding in plain sight.
If the remote still does not work after battery replacement and range testing, reprogram it. The opener may have lost memory after a power surge, logic board issue, or accidental reset. Press and release the learn button, then press the remote button as described earlier. If the opener refuses to learn the remote, compatibility becomes the prime suspect. Confirm the remote model, opener model, and learn-button color. If another remote works with the same opener, the non-working remote may be defective. If no remotes work but the wall button does, the receiver or logic board may need professional attention.
Battery, Range, Antenna, and Interference Problems
Battery problems are the easiest to overlook because a remote with a dying battery does not always fail suddenly. It may start acting moody first. One day it opens the door from the street; the next day it only works at the end of the driveway; soon you have to point it at the garage like a TV remote from the 1990s. That shrinking range is a classic sign of weak power. Replacing the battery should be the first move because it is cheap, quick, and often solves the issue. Make sure the battery contacts inside the remote are clean and springy. If they are flattened, corroded, or loose, the remote may lose power intermittently.
The antenna on the opener is another common range culprit. Most garage door openers have a thin wire hanging from the motor unit. That wire receives the remote signal. If it is tucked away, damaged, cut, or pressed against metal, reception can suffer. Do not lengthen or modify the antenna unless the manufacturer’s instructions allow it, but do make sure it hangs freely. Sometimes a homeowner paints around the opener, stores items nearby, or accidentally loops the antenna around a bracket without realizing it matters. It does matter. A hidden antenna is like cupping your hand over your phone’s microphone and wondering why people cannot hear you.
Interference can be more annoying because it is not always visible. LED bulbs are a frequent suspect in garage opener range complaints, especially low-quality or non-compatible bulbs installed directly in the opener light socket. Other possible sources include battery chargers, power tools, fluorescent lights, alarm systems, routers, and nearby electrical equipment. If your remote started acting up right after a change in the garage, pay attention to that timing. Did you install new bulbs? Add a freezer? Put in a camera? Move a charger? The garage is often full of devices that quietly create radio noise.
Testing interference requires patience, not fancy tools. Remove or turn off one possible source at a time and test the remote range. Start with the opener light bulbs because they are easy to remove. Then unplug nearby devices temporarily. Test the remote from the same spot each time so your results mean something. If range improves after removing a device, you have found the troublemaker. Replace the interfering item with a garage-door-opener-compatible version or move it farther from the opener. Many people replace remotes unnecessarily when the real villain is a noisy bulb sitting inches from the receiver.
When the Opener Memory Is Full or Needs Resetting
Garage door openers can store only a limited number of remotes, keypads, and wireless devices. When that memory fills up, a new remote may not program even if it is fully compatible. This happens more often in homes with multiple vehicles, previous owners, old remotes, keypad changes, rental turnover, or repeated attempts to program different devices. The opener’s memory becomes like a guest list that is already full. You keep trying to add one more name, but there is no room left. In that case, clearing the memory and reprogramming only the devices you actually use can solve the problem.
Clearing memory is also a smart security step when you move into a new home. You do not know how many remotes are still floating around with previous owners, relatives, contractors, tenants, or neighbors. Resetting the opener removes those old remote codes from the system. On many openers, clearing memory involves pressing and holding the learn button until the indicator light turns off or changes, but the exact method can vary. Be careful: clearing memory usually removes all programmed remotes and keypads, so you will need to reprogram each one afterward. Do not do it casually five minutes before leaving for work.
After clearing memory, reprogram your devices one by one. Start with the remote you use most often. Then program the second vehicle remote, keychain remote, keypad, and any vehicle HomeLink systems. Test each device after programming it. This organized approach prevents confusion and helps you identify a defective remote quickly. If one remote programs and another does not, the problem is likely with the second remote or its compatibility. If nothing programs after a memory reset, the opener receiver or logic board may be failing.
A memory reset can feel intimidating because it sounds like wiping a computer, but it is usually straightforward when done carefully. The bigger risk is losing track of which devices were programmed before and forgetting to re-add something important. Make a small checklist before resetting: main car remote, second car remote, keypad, keychain remote, spouse’s remote, and vehicle built-in buttons. After reprogramming, store spare remotes securely. Do not leave old remotes in junk drawers if they still work. Either reprogram them intentionally or remove their access. Your garage access system should be clean, current, and controlled by you.
Security Tips for Access Master Garage Door Remotes
Garage door remote security deserves more attention than most people give it. Your garage is not just a place for parking. It may contain tools, bikes, storage bins, sports equipment, holiday decorations, and a door into the main house. An Access Master garage door remote is basically a wireless key to that space. You would not leave your front-door key sitting on the hood of your car, but many people leave garage remotes clipped to visors in unlocked vehicles parked in the driveway. That habit creates an easy opportunity for theft. A remote in a car outside the garage can be more vulnerable than a key hidden under a mat.
The first security rule is simple: control who has access. Only program remotes you actually use. If a family member loses a remote, do not shrug it off. Clear the opener memory and reprogram the remaining devices. If you give a keypad code to a contractor, cleaner, pet sitter, or neighbor, change the code when that access is no longer needed. If you move into a house with an existing opener, reset the memory immediately. You have no way of knowing how many old remotes still exist. A fresh memory reset turns the garage access system from “who knows?” into “only us.”
Modern rolling-code remotes are much safer than old fixed-code systems, but no system is perfect if users are careless. The remote itself can still be stolen. A keypad PIN can still be guessed if it is obvious. A garage interior door can still be left unlocked. Security works best in layers. Use the remote properly, keep the keypad code private, lock the entry door between the garage and house, maintain good lighting, and consider a smart garage monitor if you often wonder whether the door was left open. The remote is one layer, not the whole fortress.
You should also be cautious with online replacement remotes. Buy from reputable sellers and avoid questionable devices that promise unusual “cloning” abilities or vague compatibility with every opener. You want a remote that pairs through the opener’s authorized programming process, not one that encourages sloppy security practices. When disposing of an old remote, remove the battery and make sure it no longer operates the door. If the remote was lost, clearing opener memory is safer than hoping it never turns up in the wrong hands. Garage security is not about paranoia. It is about treating a wireless entry device with the same respect you give any other house key.
Lost Remote? Here’s How to Protect Your Garage
A lost garage door remote should be treated like a lost house key. Maybe it fell between car seats. Maybe it is in a coat pocket. Maybe it is sitting in a parking lot with your address visible on a vehicle registration nearby. You may never know. The safe response is to erase the opener’s memory and reprogram the remotes you still have. This prevents the missing remote from working even if someone finds it. Waiting and hoping is not a security plan. It is like leaving a window unlocked because you do not think anyone will notice.
Start by gathering every remote, keypad code, and vehicle system you still want to use. Then clear the opener memory using the correct method for your model. Once memory is cleared, test the lost remote if it later turns up. It should no longer open the door unless you intentionally reprogram it. Re-add only the devices you trust. This process may take a little effort, especially if you have multiple vehicles, but it gives you peace of mind. Afterward, consider labeling your remotes discreetly without writing your address on them. A simple “Garage 1” label is useful; your full street address is not.
If the missing remote was stolen from a vehicle, take extra precautions. Check whether any documents in the vehicle show your home address. If so, secure the garage immediately and lock the door between the garage and house. If the opener has a vacation lock or control panel lock feature, activate it until you reset the system. A garage door lock mode can prevent remote operation temporarily, depending on the wall control type. This is helpful when you need immediate protection but have not yet completed a full reset.
For long-term prevention, rethink where you keep remotes. A keychain remote may be safer than a visor remote if you park outside regularly. Some homeowners use a vehicle’s built-in system instead of leaving a removable remote in the car, but that also depends on the vehicle and security habits. A wireless keypad can reduce the need for extra handheld remotes, but only if the PIN is strong and changed when needed. The goal is not to make garage access annoying. The goal is to keep convenience from turning into an open invitation.
Maintenance Tips to Make Your Remote Last Longer
Maintaining an Access Master garage door remote does not require a toolbox full of specialty gear. Most remote problems come from neglect, impact, moisture, weak batteries, dirty contacts, or worn buttons. Start with the basics. Replace the battery before it completely dies, especially if range starts shrinking. Keep the remote dry. Do not leave it in extreme heat on a dashboard for long periods. Avoid dropping it onto concrete. A garage remote is small, but inside that plastic case are delicate contacts and a circuit board. Treat it like a small electronic key, not a bottle opener or stress toy.
Cleanliness also matters. Dirt, pocket lint, coffee spills, and grime can work their way around the buttons. If a button feels sticky or does not spring back normally, the remote may send inconsistent signals. Wipe the outside with a slightly damp cloth, then dry it thoroughly. Do not soak the remote or spray cleaner directly into the buttons. If you open the battery compartment, inspect for corrosion. White or greenish residue around the battery contacts means the battery may have leaked. Light corrosion can sometimes be cleaned carefully, but severe corrosion may mean the remote is no longer reliable.
You should also test your remotes occasionally. Many households have a “backup remote” that sits in a drawer for years. When the main remote fails, they discover the backup battery is dead or the remote was never programmed after the last opener reset. Every few months, press each remote from a normal distance and confirm it works. Test the keypad too. This small habit prevents surprises. It is much better to find a dead remote on a quiet Saturday afternoon than during a storm when you are trying to get inside quickly.
Do not ignore the opener itself. A remote can only perform well if the receiver and door system are healthy. Keep the opener antenna visible, use compatible light bulbs, maintain the garage door hardware, and make sure the safety sensors are aligned. If the door is heavy, noisy, jerky, or unbalanced, the opener may struggle even when the remote signal is perfect. A garage door remote is like a steering wheel: it gives the command, but the machine still has to be in good condition to respond properly. Taking care of the whole system makes the remote seem better because the opener has fewer reasons to hesitate, reverse, or fail.
When to Replace Your Access Master Remote or Opener
Replacing an Access Master garage door remote makes sense when the remote is physically damaged, unreliable after a fresh battery, incompatible with your current opener needs, or no longer available in a secure format. A cracked case, broken button, corroded battery contacts, or weak signal after troubleshooting usually means the remote has reached the end of its useful life. Remotes are not meant to last forever. They get dropped, baked in cars, carried on keychains, pressed thousands of times, and exposed to dust and moisture. At some point, replacing the remote is simpler and safer than trying to revive it.
Replacing the opener is a bigger decision, but sometimes it is the smarter move. If your opener is very old, uses outdated fixed-code technology, lacks modern safety features, struggles to move the door, makes excessive noise, or has a failing logic board, buying another remote may only delay the inevitable. A new opener can offer better security, quieter operation, improved lighting, battery backup options, smartphone control, and easier remote compatibility. The garage door opener is not just a motor; it is part of your home’s access system. If that system feels unreliable or outdated, upgrading can improve both convenience and peace of mind.
Here is a practical way to decide:
| Situation | Replace Remote | Replace Opener |
| Remote case is cracked but opener works well | Yes | No |
| Remote battery drains quickly or contacts are corroded | Yes | No |
| Opener uses very old fixed-code technology | Maybe | Often worth considering |
| No remotes will program even when compatible | Maybe | Possibly, especially if receiver is failing |
| Door is noisy, heavy, or reverses often | Not enough | Inspect door and opener |
| You want smart control and better security | Maybe | Yes, if current opener cannot support upgrades |
The opener’s age and condition matter, but so does your lifestyle. A busy household with multiple drivers, deliveries, kids, and frequent garage use may benefit more from a modern system than a household that opens the garage twice a week. If you constantly worry whether the door closed, smart monitoring may be worth it. If your remote works only from five feet away despite troubleshooting, the receiver may be tired. If your opener sounds like a blender full of gravel, the remote is not the real problem. Listen to what the system is telling you.
Before replacing anything expensive, check the door balance and hardware. Disconnect the opener using the emergency release when the door is closed, then carefully lift the door manually. A properly balanced door should move smoothly and not feel dangerously heavy. If it is hard to lift or slams down, the springs or hardware need professional service. Do not adjust torsion springs yourself; they are under high tension and can be dangerous. A weak opener may actually be fighting a bad door. Replacing the remote will not fix that. Replacing the opener without fixing the door can wear out the new motor too.
Conclusion
An Access Master garage door remote may be small, but it plays a big role in your daily routine and home security. When it works, you barely notice it. When it fails, it can throw off your whole day. The good news is that most remote issues are not mysterious once you understand the basics. The remote sends a coded radio signal, the opener receives and verifies it, and the door moves only if the system is powered, programmed, safe, and mechanically healthy. That means troubleshooting is not about guessing. It is about following the trail from battery to signal to opener memory to door movement.
The smartest place to start is always compatibility. Check the opener model number, learn-button color, and remote type before buying a replacement. If you already have the remote and it will not work, replace the battery, test the range, inspect the antenna, remove possible interference, and reprogram it carefully. If the remote was lost or stolen, clear the opener memory and reprogram only the devices you trust. Treat every garage remote like a key to your home because that is exactly what it is. Convenience should never come at the expense of security.
For many homeowners, a replacement remote is all that is needed. A good compatible remote can bring an older opener back into everyday usefulness without much cost or effort. But there are times when the opener itself deserves attention. If the system is outdated, insecure, noisy, unreliable, or unable to support modern access needs, replacing the opener may be the better long-term investment. A garage door system should feel dependable, not like a daily negotiation. You should not have to press the button six times, lean out the window, or whisper encouragement to the motor every time you come home.
The best approach is calm, practical, and step-by-step. Identify the opener. Match the remote. Program it correctly. Troubleshoot simple problems first. Keep access secure. Maintain the remote and opener together. When you do that, your garage door remote becomes what it should be: a quiet, reliable tool that makes coming and going easier. No drama, no guessing, no driveway frustration. Just one button, one signal, and a door that opens when you need it.
FAQs About Access Master Garage Door Remotes
1. How do I know which Access Master garage door remote I need?
The best way to choose the right remote is to check the model number on your garage door opener motor unit and identify the color of the learn button. The learn button is usually near the antenna wire or behind the light cover. Once you have that information, compare it with the compatibility details of the replacement remote. Do not rely only on the appearance of your old remote because many garage remotes look similar while using different internal technology. Matching the opener model and learn-button color gives you a much better chance of buying a remote that programs correctly the first time.
2. Why won’t my Access Master remote program to the opener?
The most common reasons are weak battery, wrong remote compatibility, incorrect programming steps, missed timing, full opener memory, or a receiver issue in the opener. Start by replacing the battery and confirming the remote matches your opener’s learn-button color and model. Then press and release the learn button, press the remote button, and wait for the opener light or indicator to confirm pairing. If the opener memory is full, you may need to clear it and reprogram all trusted remotes. If no compatible remote will program, the opener’s logic board or receiver may need inspection.
3. Can I use a universal remote with an Access Master garage door opener?
Yes, a universal remote may work with an Access Master garage door opener, but only if it supports the opener’s technology, frequency, and learn-button type. Universal does not mean every opener in the world. It means the remote is designed to work with a range of systems. Read the compatibility chart carefully before buying. Universal remotes are especially useful when you have multiple opener brands or an older system with limited replacement options. Just be prepared to follow a more detailed programming process than you would with an original-style replacement remote.
4. What should I do if I lost my Access Master garage door remote?
Treat a lost remote like a lost house key. Clear the opener’s memory so the missing remote can no longer open your garage. Then reprogram only the remotes, keypads, and vehicle systems you still control. If the remote was stolen from a vehicle that also contained your address, secure the garage immediately and lock the door between the garage and the house. You may also want to change keypad PINs and review who has access. Losing a remote is inconvenient, but resetting the system quickly keeps the situation from becoming a bigger security risk.
5. Why does my garage remote only work when I’m close to the door?
Short range usually points to a weak battery, antenna problem, or radio interference. Replace the remote battery first, then check that the opener’s antenna wire hangs freely and is not damaged or tucked into the motor housing. If the problem started after installing new LED bulbs in the opener, remove them temporarily and test the remote again. Some bulbs and electronics can interfere with garage door remote signals. Nearby chargers, routers, lights, and electrical devices can also cause issues. Testing one possible source at a time can help you find the problem without replacing a perfectly good remote.
About All Action Alarm: Your Trusted Partner in Home Security Solutions
When it comes to protecting your home and loved ones, there’s no room for compromise. At All Action Alarm, we take home security to the next level by offering top-tier protection with cutting-edge technology and expert monitoring services that you can rely on. As a leader in the security industry, we’re committed to keeping homes and businesses safe, providing peace of mind 24/7.
Check out Home Video Surveillance Systems and Get Started with All Action Alarm Today!
Don’t wait for an emergency to take action. Protect your home and family with the best in the business. Call (631) 549-7225 to schedule your consultation, or visit allactionalarm.com to learn more about our services.
Your safety is our top priority.
SOURCEs
https://support.liftmaster.com


 Ca.garcia.s, CC BY-SA 4.0